
A bad print order often starts before production: artwork may not suit the print process, job specifications may be incomplete, or the finished result may not match what you expected. To understand why my last print order was bad, start with the artwork and the details supplied for the job. Print files are generally prepared at 300 DPI at final size, with colour mode and bleed considered too.
It’s frustrating to receive printed items that look wrong, especially when you’ve already spent time and money on the order. The cause isn’t always obvious: an unsuitable file, missing details such as finish or material requirements, or poor support after delivery can all play a part. This article explains what to look for, how mismatched specifications can affect the result, and what practical steps to take when an order disappoints. You’ll have a clearer way to describe the problem and seek a useful response.
Key Takeaways
- Compare the finished print with your approved artwork and order details to pinpoint what went wrong.
- Review resolution, colour mode and bleed before submitting artwork, as file preparation can affect the result.
- When contacting support, describe the fault clearly and include relevant order details and photos to help explain the issue.
- Clear specifications reduce uncertainty; for custom clothing printing, define the product and print requirements before production.
1. After-print support
A poor result needs a clear record before anyone can diagnose it. Compare the delivered print with the approved proof, order details and any written production requirements. For example, if 500 brochures look washed out, photograph the whole batch and close-ups showing the colour problem. Keep the packaging, delivery note and order confirmation together. These details help separate a production fault from a difference between the supplied artwork and the agreed result.
For a UK consumer complaint, focus on whether the printed work matches what you ordered and agreed. Describe the specific difference, provide evidence, and ask the print shop to explain its proposed resolution. Keep communication in writing where possible. Your order records and the shop’s terms can help establish what was agreed and which remedy may address the problem.
A print shop may propose a reprint, refund or partial refund to resolve a bad order. The appropriate option depends on the fault, the order agreement and whether a corrected reprint would meet your needs. State the outcome you’re seeking, and keep the discussion focused on evidence and the practical impact of the defect.
- Record the fault. Photograph affected items in good light, showing both the overall print and the specific flaw. Note whether the issue affects every item or only part of the batch.
- Gather order evidence. Attach the order confirmation, approved proof and messages describing the job. Point to the exact detail that differs, such as a missing colour or misplaced design element.
- Explain the impact. State whether the items can still be used. A trade-show batch that arrives after the event has a different practical impact from a small defect on otherwise usable stock.
- Request a clear next step. Ask whether the shop proposes correction, replacement or a financial remedy. Confirm the agreed action and any practical arrangements in writing.
Keep a simple timeline of your complaint and the replies. One account of a print-order problem describes spending about four hours on reprinting and resubmission. A clear evidence pack makes the issue easier to explain and any proposed solution easier to assess.
2. Artwork and print preparation guidance
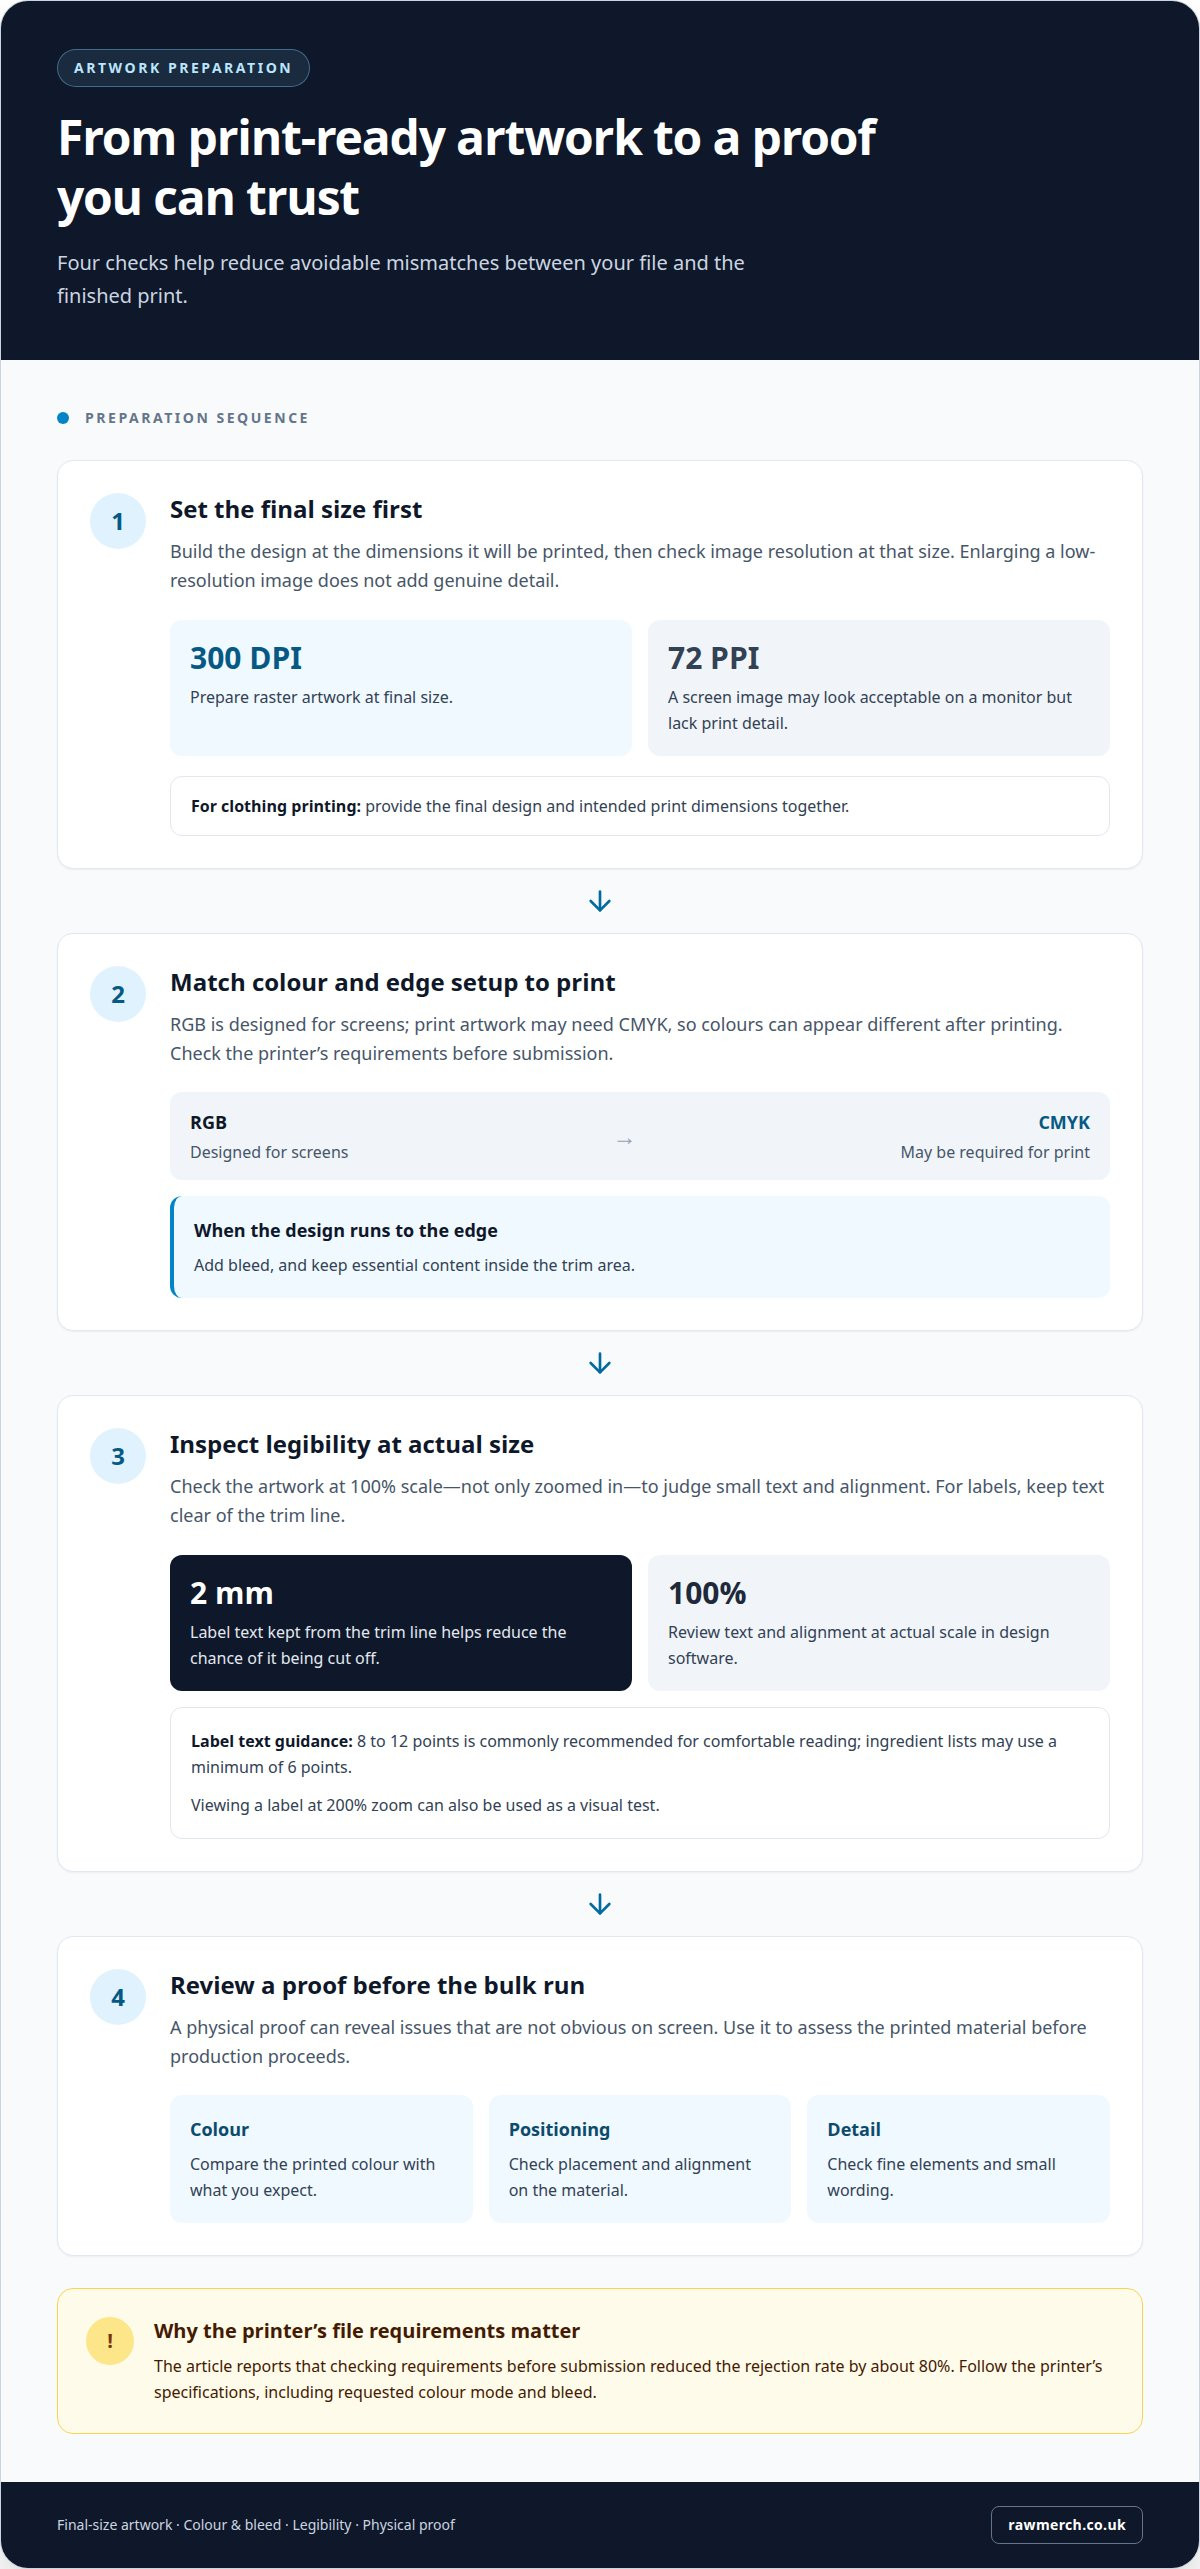
Artwork that looks sharp on a screen can turn soft or pixelated in print. Prepare raster artwork at 300 DPI at its final size; enlarging a low-resolution image won’t add genuine detail. A 72 PPI screen image may look acceptable on a monitor but can lack the detail needed for a printed result.
Colour settings matter too. RGB is designed for screens, while print artwork may need CMYK, so colours can appear different after printing. Include bleed where the design runs to the edge, and keep important text clear of the trim area. For a label, keeping text 2 mm from the trim line helps reduce the chance of it being cut off.
Check the artwork at its actual size, not only zoomed in. At 100% scale, small text and alignment problems are easier to judge. Label text is commonly recommended at 8 to 12 points for comfortable reading; ingredient lists may use a minimum of 6 points. A physical proof can also reveal issues that aren’t obvious on screen.
Before placing your next order, follow a short preparation sequence:
- Set the final dimensions. Build the design at the size it will be printed, then check image resolution at that size.
- Confirm colour and bleed. Prepare CMYK artwork where required, add bleed for edge-to-edge designs, and keep essential content inside the trim area.
- Inspect legibility. Review text at 100% scale. For a label, check whether small wording remains readable at its intended printed size.
- Review a proof. Request a physical proof before a bulk run, so you can assess colour, positioning and detail on the printed material.
For artwork created for clothing printing, provide the final design and intended print dimensions together. Clear, correctly sized artwork gives production a specific file to work from and helps prevent avoidable mismatches.
Also check the printer’s file requirements before submission, alongside bleed and the requested colour mode; the author recommends preparing files to the printer’s specifications and using CMYK rather than RGB. The author says checking requirements before submission reduced the rejection rate by about 80%. A label can also be viewed at 200% zoom as a visual test, while checking text at 100% zoom in design software remains recommended before printing.
3. Contacting customer support
A focused first message helps support identify the order and understand the fault. Use the order reference in the subject line, then state what arrived, what you expected, and how they differ. For example: “Order 4821: the printed logo is black, but the approved version is navy.” Keep the opening factual and avoid combining unrelated problems.
Send your message through the contact channel used for the order, such as the original email thread or customer account. This keeps the specifications and replies together. If you call, note the date, who you spoke with and any agreed next step. Follow up in writing so both sides have a clear record.
Make the request easy to answer. Use this sequence:
- Identify the job. Give the order reference, product type and delivery date. For example, name the batch of event leaflets rather than saying “my print job”.
- Describe the difference. State one observable fault, such as text cut off at the edge or an incorrect colour. Explain which part of the agreed result it conflicts with.
- Explain the effect. Say whether the fault makes the items unusable, or whether only part of the batch is affected. This helps support understand the practical urgency.
- Ask for a specific response. Request an explanation and a proposed remedy, such as correction or replacement. If you prefer another outcome, state why it would resolve the problem.
Keep your tone firm and professional, even if the order has disrupted a launch or event. A clear request gives the support team a specific issue to investigate. Avoid sending several messages with changing descriptions; update the original thread instead. If the first reply doesn’t address the fault, identify what remains unanswered and restate the outcome you want. Keep copies of the exchange and note agreed actions. This creates a clear timeline if the issue needs to be escalated within the same business.
4. Incomplete print specifications
People asking why my last print order was bad often focus on artwork, but vague production details can matter just as much. “Glossy finish” doesn’t say which surface or material should receive it. “Large format” doesn’t specify the finished dimensions. Such gaps leave room for different interpretations before production begins.
Paper weight is one detail to specify. GSM describes paper weight, and a mismatch between the paper loaded and the settings for its finish or GSM can cause smudging or streaks. For example, using coated stock with settings for another paper type can affect the result. The material and production settings need to match. When sourcing pre-printed decorative pieces rather than configuring custom jobs, dedicated wall art retailers such as americanluxurygifts.com already account for paper stock and finish compatibility across their themed print collections.
Build a complete job brief by stating the decisions that define the finished item:
- Material and finish: identify the stock or garment, plus the intended surface finish. Replace “premium paper” with a clear material description.
- Finished size and orientation: give the final dimensions and whether the layout is portrait or landscape. “A5 landscape” is clearer than “small flyer”.
- Print sides and colour: state whether printing is single-sided or double-sided, and describe the intended colour treatment.
- Quantity and finishing: specify the number required and any finishing, such as folding, binding or trimming.
- Reference files: identify the approved artwork version and connect it to the job details, so an older file isn’t mistaken for the final one.
To work out why my last print order was bad, trace each visible fault back to a job detail. Read the brief as a production handover. If “standard finish” could mean different things to different people, replace it with a precise description. Resolve unclear terms in writing before approving the job. This helps distinguish a production mismatch from an expectation that wasn’t included in the order details. The same principle applies across other custom fabrication workflows; for teams developing physical products and prototypes, firms such as VPrint3D Limited similarly rely on strict dimensional and material specifications to prevent manufacturing errors.
For a project with several specifications, share your print requirements in one organised brief. Clear instructions give production a defined target and make the finished result easier to assess against the agreed details.
If the specifications appear consistent, check whether printer drivers are up to date. Incompatible drivers can cause printing problems, so driver compatibility is another factor to consider alongside the material and production settings.
RAW Merch: clothing printing
RAW Merch prints clothing for projects where clear specifications and a consistent finished look matter. If your next order is for branded teamwear, event clothing or merchandise, you can apply the lessons above when preparing your brief.
Choose from Custom T-Shirts & Hoodies, Promotional Items and Headwear. Bring together your chosen item, artwork and key requirements for the finished print. Include placement and intended colours so the job is clear from the outset. A well-defined brief helps align expectations for both the product and the print.
For example, a business ordering staff clothing can specify which items need branding and where the design should appear. An event organiser can describe the promotional merchandise needed and provide the artwork. These details help turn an idea into a defined clothing-printing project.
Contact RAW Merch to discuss your clothing printing requirements.
Make your next print project clearer from the start
Understanding why my last print order was bad can help you set clearer expectations for the next one. Treat each order as a fresh production brief, not simply a repeat of the previous job. Decide what a successful result looks like, then give the people producing it the details they need to work towards that outcome.
If your project involves printed clothing or merchandise, gather your artwork and requirements before discussing the job. A focused conversation can establish what you need and clarify the next steps. You don’t have to work out every technical detail alone. Start with the purpose of the order, the items you have in mind and the result you want.
Contact RAW Merch for help with your next print project. Take the next step with a clear brief and a more confident plan.
Frequently Asked Questions
What are common reasons a print order comes out badly?
Common causes include artwork that lacks detail at its final print size, colour differences between screen and print, unclear requirements, or a production fault. Inspect the defect closely: banding can appear as repeated lines, while ghosting may leave a faint duplicate image. If every item has the same fault, the cause may differ from that of a single damaged or misprinted piece.