

The quickest patch to attach isn’t always the one that will stay put. When weighing iron-on vs sew-on patches, consider the garment’s fabric and how often it will be worn, washed or put under strain.
Iron-on patches are simple to apply, but heat can damage some fabrics, and adhesive may not suit hard-wearing clothing. This guide compares how each method attaches, how it handles regular use and which fabrics may be suitable. You’ll also find practical application and care tips, plus guidance on when combining heat and stitching may make sense. Choose for the job your garment needs to do, not convenience alone.
Key Takeaways
- Iron-on patches use heat-activated adhesive, while sew-on patches are secured with thread. The best fit depends on the garment and how it will be used.
- Compare iron-on vs sew-on patches by application, durability, repairability and the finish you want, rather than assuming one method suits every project.
- Check the garment’s fabric and care label before applying a patch. Heat-sensitive, coated or textured materials call for particular caution.
- Follow the patch and garment instructions for application and washing to help protect both the attachment and the fabric.
- For a merchandise project, note the garment type, patch dimensions and expected wear before settling on an attachment method.
Iron-on vs Sew-on Patches: How Each Attachment Works
An iron-on patch bonds to clothing with heat-activated adhesive on its backing. A sew-on patch is held in place by stitches passing through the patch and garment. The key difference is adhesive activated by heat versus thread that physically secures the patch.
Attachment is separate from decoration. Embroidery, woven detail or a printed design describes the patch’s appearance; iron-on and sew-on describe how it’s fixed to clothing. Some designs can be made with different attachment options, so a detailed embroidered finish doesn’t automatically mean the patch must be sewn on. Embroidered patches offers an overview of patch construction and attachment methods.
What makes an iron-on patch stay in place?
Heat softens the adhesive on the back of the patch so it can bond with the garment. In general, position the patch, protect the surface as directed and apply suitable heat with even pressure for the time stated in the instructions. Let the bond cool before handling. Don’t assume one iron setting works for every patch or garment. The backing instructions and fabric care label determine whether heat is suitable and how to apply it safely.
How does a sew-on patch attach to clothing?
Thread stitches through the patch edge and garment to hold the patch in place. You can sew by hand for careful placement or use a sewing machine where the garment’s shape and construction allow. Stitch choice depends on the patch edge, fabric and finish you want. A neat line of stitches around the edge can secure the patch while keeping it flat, but bulky seams or awkward areas may make machine access difficult.
A patch on a flat section of a jacket may be straightforward to stitch, while one on a sleeve can be harder to reach with a machine. Hand sewing offers more control in tight spaces. Either way, make sure the patch sits flat before stitching, and support the garment so it doesn’t bunch or stretch.
Understanding these mechanics is the first step in choosing iron-on vs sew-on patches. Next, consider the garment’s fabric, the patch’s position and the demands of regular wear. Heat may be convenient, but it only makes sense when the materials can tolerate it. Stitching avoids an adhesive bond, but takes more work to apply.
Iron-on vs Sew-on Patches: Durability, Finish and Care
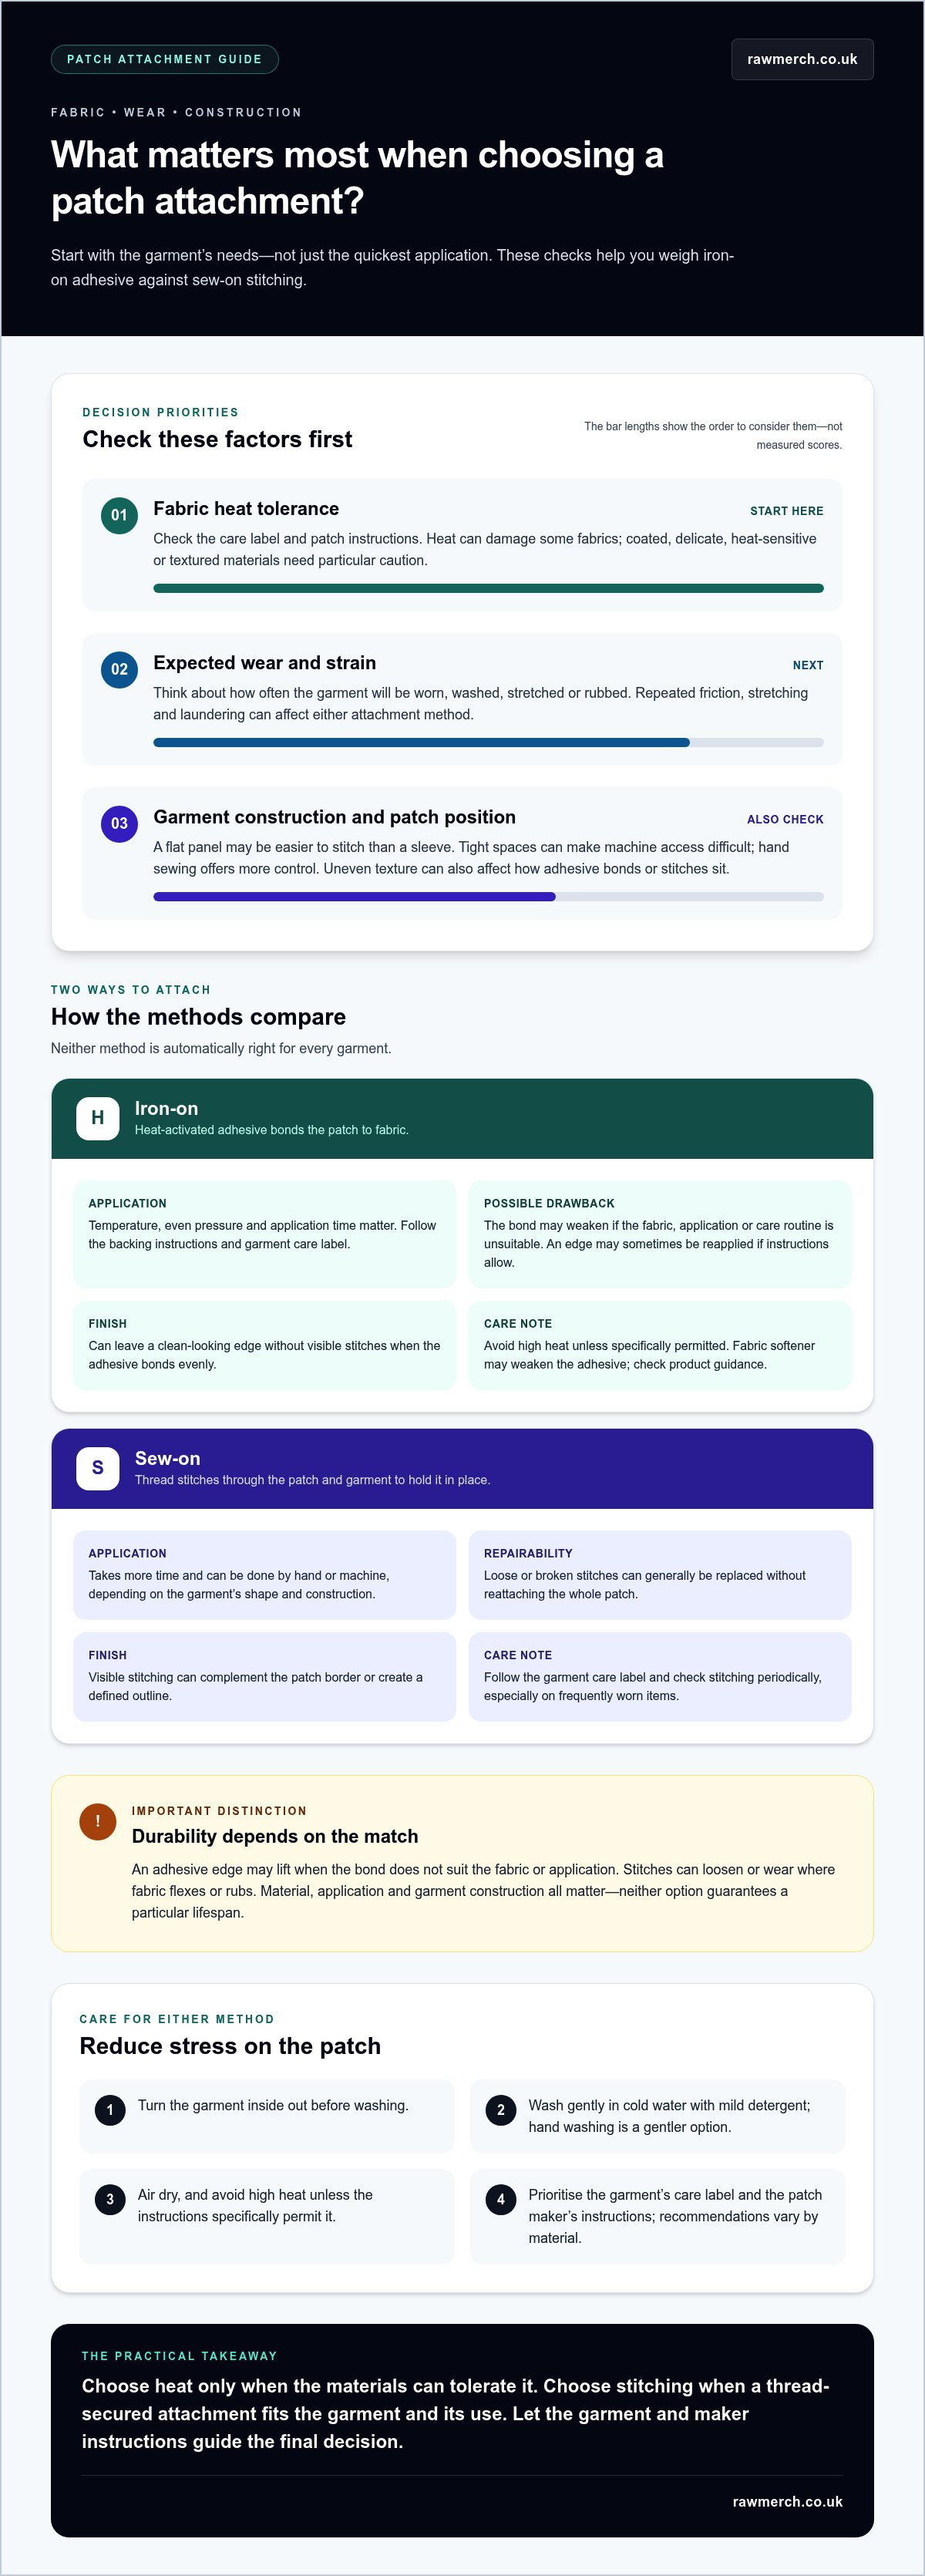
Neither attachment is automatically the right choice for every garment. Performance depends on the fabric, patch backing, application and amount of wear. Use this comparison as a guide, then follow the patch and garment care instructions for the specific materials.
| Factor | Iron-on | Sew-on |
|---|---|---|
| Application | Heat activates the adhesive. Correct temperature, pressure and application time matter. | Stitches pass through the patch and garment. Application takes more time and may be done by hand or machine. |
| How it stays attached | Bonded to the fabric with adhesive. The bond may weaken if the materials or care routine aren’t suitable. | Held by thread through the garment. Stitches may loosen or wear with use, but can often be repaired. |
| Repairability | A lifting edge may sometimes be reapplied if the instructions allow, but the adhesive can lose its hold. | Loose or broken stitches can generally be replaced without reattaching the whole patch. |
| Care | Use the garment and patch care instructions. Avoid high heat unless they specifically permit it. | Follow the garment’s care label and check stitching periodically, especially on frequently worn items. |
Which attachment is more durable for regular wear?
Repeated friction, stretching and laundering can affect either method. An adhesive edge may lift if the bond is unsuitable for the fabric or application. Stitches can loosen or wear where a garment flexes or rubs. A well-matched method, sound application and suitable garment construction all matter. Neither option guarantees a particular lifespan, so base the decision on expected use and manufacturer guidance.
For either type, turning the garment inside out, washing gently in cold water with mild detergent and air drying can help reduce stress. Hand washing is a gentler option. For iron-on patches, fabric softener may weaken the adhesive, so check product guidance before using it. Always prioritise the garment’s care label and the patch maker’s instructions, since recommendations vary by material.
How do attachment methods affect the finished look?
Iron-on attachment can leave a clean-looking edge without a visible line of stitches, provided the adhesive suits the materials and bonds evenly. Sewing creates visible stitching, which can complement a patch’s border or add a defined outline. The patch design and edge construction affect the result as much as the attachment method. Consider reinforcement stitching for an iron-on patch only if its instructions allow sewing through the backing.
For custom clothing or merchandise, decide on the attachment alongside the garment and its intended use. Explore custom clothing and merchandise printing as part of planning the wider project.
Which patch attachment suits your fabric and intended use?
Start by checking three things: what the fabric can tolerate, how the garment is constructed and how much wear the patch will face. The same attachment may work well on a flat, washable jacket panel but be unsuitable for a coated bag or textured knit. When choosing iron-on vs sew-on patches, the garment and patch maker’s instructions take priority over general advice.
Use the garment’s care label to understand its heat and washing limits. Coatings, delicate or heat-sensitive fibres, and raised or uneven textures need extra caution. Heat may damage the surface, while an uneven area can make it harder for adhesive to bond consistently or for stitching to lie flat. If the instructions don’t clearly support heat application, don’t assume it’s safe.
When is an iron-on patch a practical choice?
Iron-on attachment can suit a project where quick application and minimal visible stitching matter, provided both patch and garment instructions allow heat. A smooth, heat-tolerant fabric may provide a more even surface for the adhesive, but fabric type alone isn’t enough to decide. Check the label and patch guidance before applying heat, and take particular care with coated finishes or garments that can’t be ironed.
For an occasional-wear top or a simple decorative patch on a compatible garment, an iron-on may be convenient. It may be less suitable for a bag or work garment that sees regular rubbing, flexing or heavy use, especially if the adhesive isn’t intended for those conditions.
When is a sew-on patch the more suitable choice?
Sewing avoids heat application, so it can be useful when heat suitability is uncertain or the garment’s instructions rule out ironing. Stitches can also be unpicked for removal or repair, although doing so takes care and may leave needle marks. This makes sewing worth considering for uniforms or frequently used bags, where the patch may face repeated movement and contact.
Consider the surface and construction. A textured or thick fabric may be easier to secure with stitches than with adhesive, but bulky seams, linings or narrow areas can make sewing awkward. For everyday clothing, choose according to the garment’s wash routine and wear pattern. For an occasional-wear item, finish and ease of application may matter more than repeated abrasion.
Before deciding, note the garment material, patch position, expected wear and care routine. Then match the attachment to those conditions rather than choosing by convenience alone. If instructions are unclear, avoid a heat method until the garment and patch guidance establish that it’s suitable.
How to Apply and Care for Iron-on or Sew-on Patches
Good preparation helps either attachment sit neatly and stay secure. Before starting, read both the patch instructions and the garment care label. If their guidance conflicts, don’t apply heat or use a wash routine that could damage the fabric.
How to apply an iron-on patch safely
- Step 1: Prepare. Make sure the garment is clean, dry and laid flat. Smooth out creases and check that the chosen area can tolerate the application method.
- Step 2: Position. Place the patch where you want it and check its alignment before heating. Use pins only if they won’t damage the fabric or interfere with the patch instructions.
- Step 3: Apply heat. Follow the patch maker’s specified heat, pressure and timing. Use an iron only if the garment label permits it, and don’t rely on a generic setting. Turn off steam unless the product instructions say otherwise.
- Step 4: Cool and inspect. Let the patch cool as directed, then check the edges and centre for a secure bond. Avoid pulling at it while warm.
If an edge lifts, stop before washing or wearing the garment. Check that the fabric and patch are suitable for heat, then reapply only if the product instructions allow it. Don’t increase the temperature or application time as a guess.
How to sew on a patch and maintain it
- Step 1: Secure the position. Lay the garment flat and pin or otherwise hold the patch in place. Check that the fabric isn’t stretched or gathered beneath it.
- Step 2: Stitch the edge. Use even stitches suited to the patch border and garment construction. Keep the patch flat as you work, and secure the thread at the start and finish.
- Step 3: Check your work. Inspect the full edge for gaps, loose thread or puckering before wearing the garment.
If stitches loosen, repair them before the patch catches or pulls further. Use the garment’s care label for laundering. As a general gentle approach, turn it inside out, wash in cold water on a gentle cycle with mild detergent, and air dry. Hand washing is a gentler option for longevity. Avoid fabric softener on iron-on patches, as it may weaken the adhesive. Follow product-specific care instructions first, since materials vary.
Planning a garment project? Explore custom clothing printing and consider the garment, patch placement and care routine together.
Choose the right patch method for your custom merchandise project
Make the attachment decision part of the garment plan, not an afterthought. Consider whether the material and care label allow heat, how much wear the item will get, whether visible stitching suits the finish and how the garment will be washed. For iron-on vs sew-on patches, there’s no universal winner. The best choice is the one that fits the garment and its intended use.
A quick decision checklist before you choose
- Identify the garment. Record its material and check the care label, especially before considering heat application.
- Choose the finish. Decide whether you prefer a cleaner-looking edge or visible stitches that complement the patch border.
- Think about use. Note how often the item will be worn and washed, whether it will be exposed to friction, and whether you may need to repair or remove the patch later.
- Record the details. Write down the garment type, patch dimensions, placement and expected use. These details help keep decisions consistent across a merchandise project.
Bring patch design into the wider merch plan
Plan the patch alongside the garment colour, placement and any other printed merchandise. An embroidered design has a distinct texture and finish, so consider how it will sit beside printed artwork and other branded items. The custom embroidery guide can provide useful context for embroidered decoration and how it contributes to a garment’s overall look.
For a band project, the band merchandise guide can help you think about the wider product range. If artwork needs to work at different sizes, the vector image guide explains why clean scaling matters. Keep the design clear at the intended patch dimensions, then consider how its colours and position will work with the garment and the rest of the merchandise.
RAW Merch brings over 25 years of experience in custom clothing and merchandise production. Its services include screen printing, DTF and sublimation, which can support planning branded clothing and merchandise as a joined-up range.
Have your garment type, patch dimensions, placement and intended wear in mind, then plan your custom merchandise project with RAW Merch.
Make Your Patch Choice Part of the Plan
The right attachment depends on the garment, expected wear and finish you want. Check the care label before using heat, and follow the patch maker’s instructions for application and washing. For iron-on vs sew-on patches, choose based on material compatibility and use, not convenience alone.
For custom merchandise, record the garment type, patch size and intended use before finalising the details. This makes it easier to plan how the patch will fit with the garment and the rest of your branded range.
RAW Merch brings over 25 years of experience in custom clothing and merchandise printing, with screen printing, DTF and sublimation capabilities. Plan your custom merchandise project with RAW Merch and bring your wider merchandise plans together.
Frequently Asked Questions
Which lasts longer, iron-on or sew-on patches?
Sew-on patches are often considered more durable, especially on garments that see frequent washing, friction or movement. Stitches physically secure the patch and can usually be repaired if they loosen. Iron-on patches can also hold well when the adhesive suits the fabric and application instructions are followed. For iron-on vs sew-on patches, the garment, patch materials, application quality and care routine all affect how long the attachment lasts.
Can you sew an iron-on patch onto clothing?
Sometimes, yes, if the patch instructions allow stitching through its backing. Sewing around the edge can provide extra physical attachment, but some backings may make stitching difficult or may not be designed for it. Check the patch guidance first, then use stitches that suit the border and garment. Avoid forcing a needle through a thick or rigid backing, as this could damage the patch, fabric or needle.
Are iron-on patches suitable for every fabric?
No. Iron-on patches need heat, so they may not suit fabrics or finishes that are heat-sensitive, coated, textured or unsuitable for ironing. Heat can damage some garments, and uneven surfaces may prevent the adhesive from bonding consistently. Check both the garment care label and patch instructions before applying heat. If the guidance is unclear or heat isn’t suitable, sewing may be a better option, provided the garment can be stitched safely.
How do you stop an iron-on patch from peeling?
Start with a clean, dry garment and follow the patch maker’s instructions for positioning, heat, pressure and application time. Use heat only if the garment label permits it, then let the patch cool before checking the edges. For care, follow the garment and patch guidance, and avoid high heat or fabric softener if the patch instructions warn against them. If an edge lifts, reapply only as directed rather than guessing at a hotter setting.
Can iron-on patches go in the washing machine?
Often they can, but only if the patch and garment care instructions allow machine washing. To reduce stress on the bond, turn the garment inside out, use cold water on a gentle cycle with mild detergent, and air dry where possible. Hand washing is the gentlest option for longevity. High dryer heat may weaken adhesive, so follow product-specific drying guidance and don’t assume every patch can withstand the same wash routine.
Are sew-on patches removable?
Yes. You can remove a sew-on patch by carefully unpicking its stitches, taking care not to cut or snag the garment. Work slowly around the edge and remove any remaining thread afterwards. Depending on the fabric and stitching, small needle marks may remain, and the patch itself may show signs of use. If you might want to reposition or remove a patch later, stitching can be more practical than an adhesive bond.
What should I choose for a work uniform or frequently worn garment?
For a uniform or garment worn and washed often, sew-on attachment is commonly a practical choice because stitches can be inspected and repaired. The best option still depends on the fabric, patch construction and care requirements. Check the uniform’s care label and any workplace requirements before deciding. If considering an iron-on patch, make sure the garment and patch instructions support heat application and suit the expected wear and laundering routine.